A 26’ x 10’ custom pressure-treated deck built in Warwick, NY featuring 6x6 posts, 2x8 framing, a 7-rise staircase, and clean black aluminum railings. Finished with Windsor One trim and painted Iron Ore for a sharp, modern look, this project highlights a full start-to-finish build with attention to both structure and detail.
26' x 10' Custom Deck Build in Warwick, NY
A Clean, Durable Deck with Elevated Trim Details
This recent deck build in Warwick, NY showcases our standard decking package as well as other elements we aim for on every project at Odd Job Adam—solid structure, clean lines, and thoughtful finishing details that make the deck feel like part of the home.
The homeowner was looking for a reliable, code-compliant deck for a house that is being listed for sale in the spring. We built a 26' x 10' pressure-treated deck from the ground up, focusing on both structural integrity and visual impact.
Project Overview
Size: 26’ x 10’
Framing: 2x8 joists, 2x10 double beam
Posts: 6x6 pressure-treated
Decking: 5/4 pressure-treated boards
Fasteners: GRK 3" Elite deck screws
Stairs: 7-rise staircase with concrete landing
Railings: Pressure-treated rails with black aluminum balusters
Trim: Windsor One skirt board + stair trim
Finish Color: Sherwin Williams Iron Ore (urethane trim paint)
Step 1: Footings & Layout
The existing deck footings were still here, but they were tapered and only went about 20" deep, so we had to remove those footings with a small excavator and then we dug the holes for our footings, which have to be below the frost line in Warwick, NY which is 42" deep. We dug these deeper so that the top of our footing stayed below the frost line.
Setting the footings correctly is what prevents settling and shifting down the road. Having a wide footing at the right depth is more important than having concrete span the full depth of the hole. As this project was on a stricter budget, we designed this deck to have footings poured below the frost line, with the posts resting on top of the footing below grade. This approach gets criticism in several social media circles, but is still an approved installation method with the IRC and is an effective way to construct durable residential decks without excessive amounts of concrete. This construction also provides a lot of lateral stability to a deck because the posts are supported by the soil for the first 42+ inches which provides a lot of lateral stability to the structure. With that said, we also provide concrete pier style footing for projects depending on the goals of the homeowner.
This job required old cone shaped footings that were still onsite, so we used an excavator to remove footings and dig the new footing holes to the proper depth.
This deck features 6x6 posts set on a 18" diameter footing that is 8" thick set below frost depth. This method is a more affordable option we offer to deck piers, but offers superior lateral stability while still offering a durable code approved post/footing construction.
Here are posts are set and plumbed up before we brace them off for backfilling. We compact soil around the posts to ensure they have no movement and this adds a significant amount of lateral stability to the deck once backfilled. For wet areas, the post can be treated with a tar/flashing tape at the soil line to increase post durability.
Step 2: Ledger Installation
We installed a properly flashed and secured ledger board to tie the deck into the home. This is one of the most critical structural connections on any deck and something we take seriously on every build. We use Fastenmaster LedgerLoks at the engineering spacing pattern, staggered along the ledger. We ensure fasteners don't fall behind any joist hangers, and ensure they are being fastened into strong structural lumber of the home.
On this project, the previous ledger board did not have flashing, so there were areas of rot affecting the sheathing/plywood. We removed all rotted plywood, and replaced it with new sheathing plywood to ensure structural integrity.
For flashing the ledger board, we ran 10" Tyvek flashing tape behind the ledger and Flashing tape over the top of the ledger once installed, with a Amerimax galvanized aluminum flashing on top. This metal flashing sits on top of the ledger tape to help prevent any corrosion of the aluminum. The aluminum flashing then gets flashing tape on the top edge to cover fasteners and connect the system directly to the sheathing. The building wrap then runs over this layer of flashing and is taped with a tyvek tape to ensure no water can reach framing material on the house, especially during heavy weather events or high snow pack.
The ledger board flashing detail is visible here. We removed a course of vinyl siding to ensure proper flashing along the run of the ledger board.
Step 3: Framing the Deck
The frame was built using 2x8 joists supported by a 2x10 double beam on 6x6 posts.
This setup provides a strong, rigid structure while keeping the deck profile clean and proportional to the home. Blocking is added mid span for stability and over the beam. Both of these are required by code, but also help to stiffen up the deck and gives your deck framing a solid feel.
The ledger side receives joist hangers, and we attach hurricane clips on the beam side.
At this stage the railing posts are attached to the inside of the rim/band joists with a combination of Structural screws, carriage bolts, and/or Thrulok fasteners. We do not notch railing posts, and design our railing systems to be more secure than the notched 4x4 posts of old.
We take extra care during framing to ensure:
Tight, consistent spacing
Clean cuts and alignment
Solid connections throughout
Deck Framing included 2x8 joists set on a 2x10 double beam. We run midspan blocking which stiffens up the deck and blocking over the beam. Flashing tape is run over the joist/ledger attachment in this application to protect water entering the end of the joists. Full joist taping is also an add-on we offer. Railing posts are then added into the framing with blocking behind for a rigid rail system.
Step 4: Stair Construction
The staircase includes 7 rises and was built for both comfort and durability. We custom cut our stringers to ensure a consistent rise and run across all treads, rather than purchasing precut stringers, which may require concessions to fit the finished grade. Stringers are attached to a drop header, which is tied into the main deck framing with 5" HeadLok fasteners. We then attach each stringer with Simpson Stair connector hardware to ensure a solid connection.
We installed:
Solid stringers
Clean, consistent tread spacing
Matching trim on risers and sides
We cut a 1x12 skirt board to wrap the outer stringers and use trim lumber for the risers so that the stairs tie seamlessly into the deck and maintain the same clean aesthetic.
Stairs are installed with a drop-header blocked in with 4x4s and a 2x8. The stair stringers are cut custom to match the final rise of the deck and then attached with Simpson Stair Connectors to the drop header. This also shows us using GoBoard as a shim/spacer for providing a drainage plane between the rim joist and the fascia/trim.
Step 5: Decking Installation
We installed 5/4 pressure-treated decking using GRK 3" Elite deck screws for a strong, long-lasting hold.
Boards were laid out cleanly with consistent spacing and alignment to give the surface a professional, finished look. For our decking design layout, we offer staggered joints, breaker boards, and picture frame installation. Since this homeowner was on a tighter budget and was not concerned about decking layout, we installed a staggered joint system where the decking boards have a butt joint that alternates each decking board. Instead of having this butt joint meet at a single joist though, we double up the joists where the seams will be to ensure each board has a full 1.5" purchase on the end, opposed to splitting a joist, which is often where we see failure when removing older decks.
Our base decking option is premium pressure treated decking installed with staggering seams. this means we alternate boards so seams only hit every other board. Instead of putting seams over a single joist. We double up the joist where seams are so you get full purchase at the seams.
This decking project had a downspout gutter system that needed to run through the center of the decking. We removed the downspouts to install then, reinstalled and notched the decking around the downspouts for a clean finish that is still easy to maintain.
Step 6: Railings with Aluminum Balusters
The railing system combines:
Pressure-treated wood framing
Black aluminum balusters
This gives the deck a modern contrast while keeping the warmth of natural wood.
This upgrade offers homeowners a clean modern aesthetic, while also reducing the need to paint balusters for maintenance down the road. All railings are run in 6' spans or less, and are installed with a 3.5" gap at the bottom to facilitate snow and debris removal from the deck.
This deck featured prefabricated pressure treated railing with aluminum balusters. These come in the flat setup, but the stair railings have to be built onsite to match the look of the horizontal railings.
Step 7: Trim & Finishing Details
This is where the project really stands out.
We installed high-grade Windsor One trim along the rim joist and stair components, creating a clean skirt around the deck.
Everything was finished with Sherwin Williams Urethane Trim Paint, Color: Iron Ore for durability and a bold, modern look.
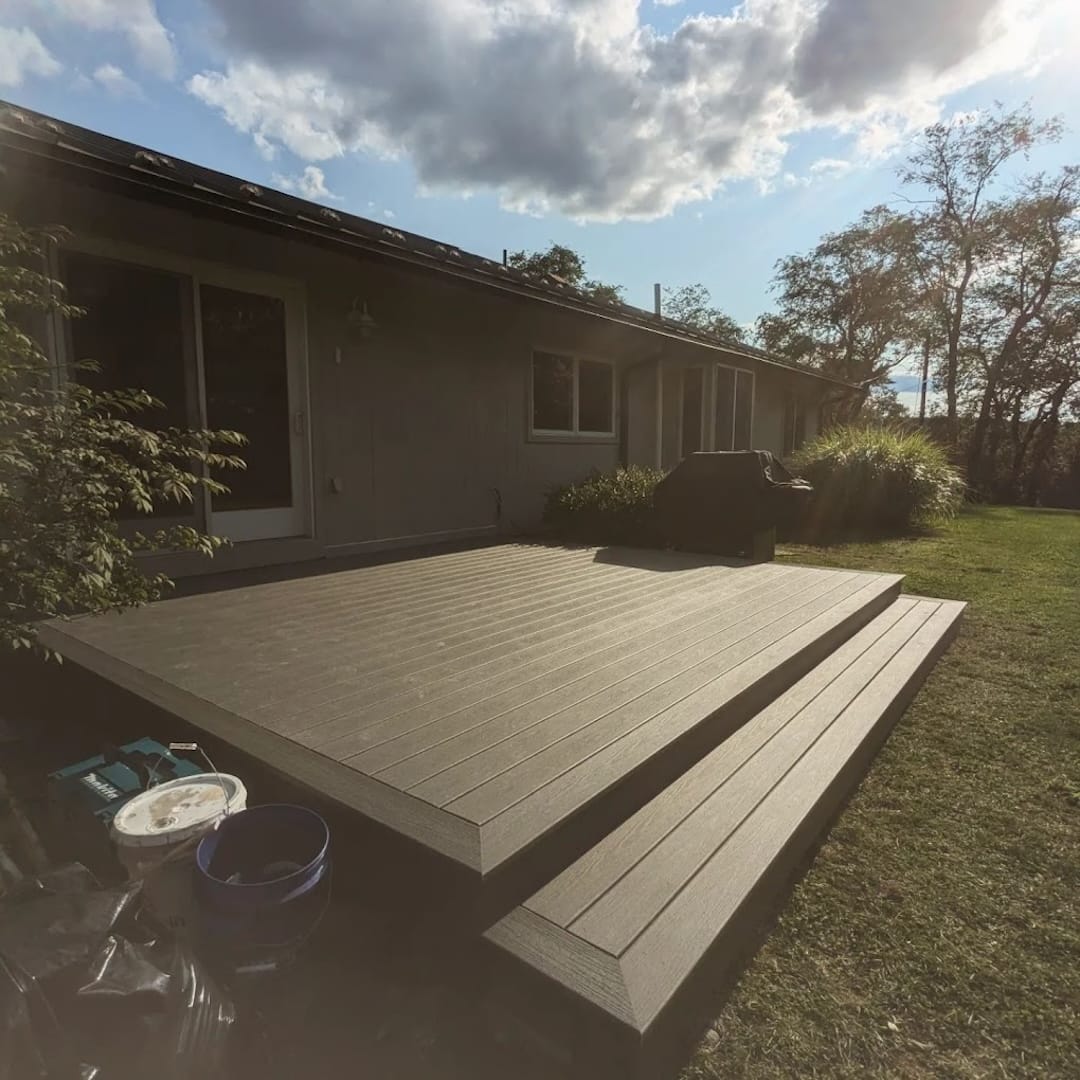
The contrast between the natural wood and dark trim gives the deck a sharp, high-end feel that you can see in the final result.
This image shows the Windsor One Trim installed and painted with Sherwin Williams Urethane Trim paint to create a smooth durable finish on the Risers and Skirt Board.
Final Result
The finished deck is:
Structurally solid
Cleanly framed
Thoughtfully finished
Built to last
Reasonably Priced
The added trim and color details take what could be a standard pressure-treated deck and elevate it into something that truly stands out.
Thinking About Building a Deck in Warwick, NY?
If you're considering a new deck or replacing an existing one, we focus on building structures that not only last—but look great doing it.
👉 Reach out to Odd Job Adam to start planning your project.


.jpg)
